HTC M8 , specs upgraded to the HTC One is a high-end smartphone and promising one too.Often compared with Samsung's Galaxy S5.
 XDA members Jcase and Beaups founded this exploit , thou this needs rooting device on every reboot.
GAIN ROOT AND S-OFF-
-Download file from here
-Install the APK , run it and hit agree
-Install SuperSU from Play Store and reboot the device
-Exploit will root the device after it fully boots up , around 30 seconds.
IMAGE COURTESY-XDA-Developers
 XDA members Jcase and Beaups founded this exploit , thou this needs rooting device on every reboot.
GAIN ROOT AND S-OFF-
-Download file from here
-Install the APK , run it and hit agree
-Install SuperSU from Play Store and reboot the device
-Exploit will root the device after it fully boots up , around 30 seconds.
IMAGE COURTESY-XDA-Developers
Xperia Z2 has impressive numbers in contrast to hardware specifications and a good update to the Xperia Z1,the predecessor,mainly the display which the Z1 compromised with.
Rooting the phone is easy which includes unlocking bootloader and flashing Doomlord's kernel ,asap,you will be able to flash custom Roms and Xposed modules.Credits go to XDA-member DooMLord and various contributors.
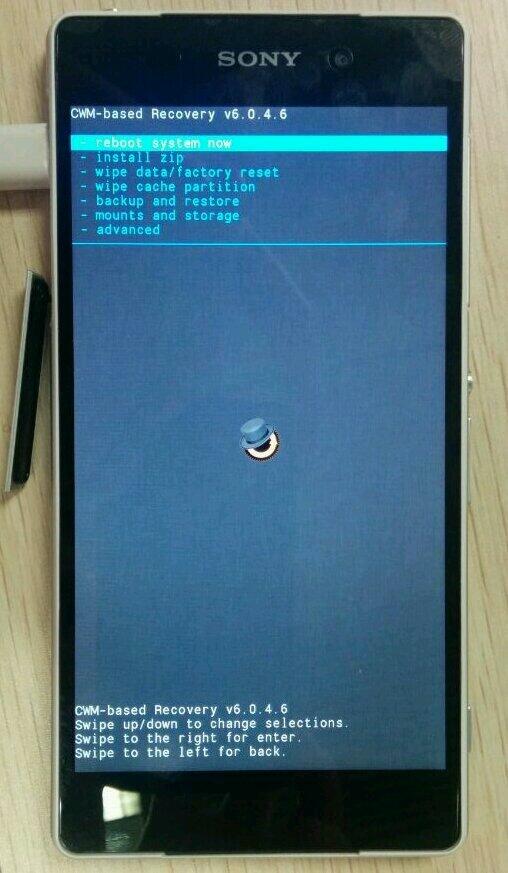
PRE-REQUISITES-
-Note your IMEI by dialing *#06# and copy it down somewhere and install the drivers package.
-Download fastboot package here
-Download FlashTool driver Xperia pack from here and install fastboot drivers and adb drivers
-Switch off your phone and connect to USB,now power up and hold power+volume up buttons .This will install fastboot drivers
-Once done disconnect and power on the Z2.
UNLOCKING BOOTLOADER-
~Official Way
-Go to http://unlockbootloader.sonymobile.com/ and read .
Rooting the phone is easy which includes unlocking bootloader and flashing Doomlord's kernel ,asap,you will be able to flash custom Roms and Xposed modules.Credits go to XDA-member DooMLord and various contributors.
PRE-REQUISITES-
-Note your IMEI by dialing *#06# and copy it down somewhere and install the drivers package.
-Download fastboot package here
-Download FlashTool driver Xperia pack from here and install fastboot drivers and adb drivers
-Switch off your phone and connect to USB,now power up and hold power+volume up buttons .This will install fastboot drivers
-Once done disconnect and power on the Z2.
UNLOCKING BOOTLOADER-
~Official Way
-Go to http://unlockbootloader.sonymobile.com/ and read .
-Click start unlocking bootloader
-First, you should confirm that it is possible to unlock the boot loader of your phone by checking the service menu. In your phone, open the dialler and enter *#*#7378423#*#* to access the service menu.
-Now bootloader should be unlocked successfully
FLASHING CUSTOM RECOVERY-
-Download this file on PC.This contains DooMLord's kernel and recovery
-Save boot.img to fastboot directory
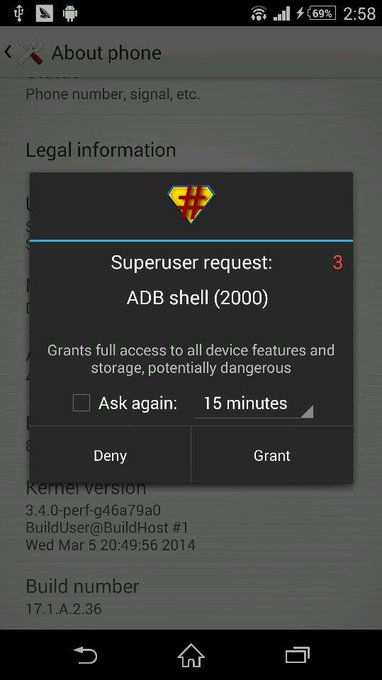
ROOTING-
-Reboot into recovery and flash SuperSU file
-Reboot
In your phone, tap Service info > Configuration > Rooting Status. If Bootloader unlock allowed says Yes, then you can continue with the next step. If it says No, or if the status is missing, your device cannot be unlocked.
-After seeing Yes,scroll to bottom and select unlock bootloader.
-Accept all prompts.Enter your "IMEI" in request unlock page , name and e-mail
-Check e-mail and save the key.Extract the file and open fastboot folder ,hold shift and right click and select open command window here ;Turn on your phone with USB in fastboot mode as mentioned above
-Accept all prompts.Enter your "IMEI" in request unlock page , name and e-mail
-Check e-mail and save the key.Extract the file and open fastboot folder ,hold shift and right click and select open command window here ;Turn on your phone with USB in fastboot mode as mentioned above
-Type fastboot.exe -i 0x0fce getvar version in cmd
-If value returns to 0.5 or w/e means phone is properly connected .Type fastboot.exe -i 0x0fce oem unlock 0xKEY and replace KEY with which you received through e-mail.-Now bootloader should be unlocked successfully
FLASHING CUSTOM RECOVERY-
-Download this file on PC.This contains DooMLord's kernel and recovery
-Save boot.img to fastboot directory
-Open fastboot (as mentioned above step-5)and type fastboot flash boot boot.img and then type fastboot reboot
-Enter into recovery by tapping or pressing volume botton when SONY logo flashes
ROOTING-
-Reboot into recovery and flash SuperSU file
-Reboot
-You need recovery for this
-Download this and copy onto your phone . This contains SuperSU flashable zip.
INSTALLING BUSYBOX-
-Go to Play Store and download busybox installer
-Install busybox in /system/xbin
-Reboot the device
Sources-XDA-Developers
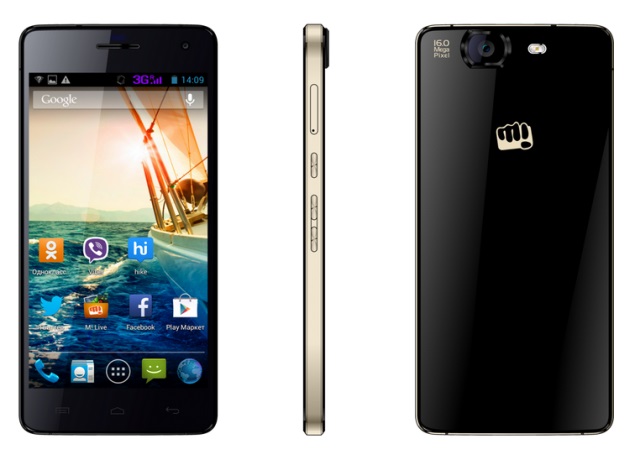
Follow these steps-
1.Download Framaroot from here
2.Copy and install it on your phone
3.Select SuperSU and select the exploit boromir
4.Reboot the phone .
CWM or TWRP isn't available for the users as development is under process .Till then rooted users can overclock the phone by installing SetCPU or No-frills CPU Control or use Xposed Modules if they are compatible
The Galaxy S5 , much awaited smartphone across the world ,not available officially yet , has been rooted by Senior Recognised Developer of XDA-Developers ;Chainfire .It was the International SM-G900F variant of the Galaxy S5.The procedure is easy thou, in form of CF-Auto-Root,which is also used to root other Samsung Android variants like the Galaxy S2,S3,S4 and Galaxy TAB series also.
CF-Auto Root will install Super-SU apk and binary on to the phone thus granting root access.
NOTE-Rooting will increase your flash counter and trips KNOX warranty flag.
Follow the procedures as listed-
1.Download file from here
2.Download ODIN v.307 from here
3.Extract the 1st file on Desktop
4.Open ODIN
5.Click PDA button and select CF-Auto-Root.....tar.md5 and DE-SELECT Re-Partition (Selecting will cause a soft-brick)
6.Power off the Galaxy S5 and connect it to PC via USB.Go into download mode by holding Volume down+Home+Power Button

7.Click on Start button and wait for the phone to boot.
CF-Auto Root will install Super-SU apk and binary on to the phone thus granting root access.
NOTE-Rooting will increase your flash counter and trips KNOX warranty flag.
Follow the procedures as listed-
1.Download file from here
2.Download ODIN v.307 from here
3.Extract the 1st file on Desktop
4.Open ODIN
5.Click PDA button and select CF-Auto-Root.....tar.md5 and DE-SELECT Re-Partition (Selecting will cause a soft-brick)
6.Power off the Galaxy S5 and connect it to PC via USB.Go into download mode by holding Volume down+Home+Power Button
7.Click on Start button and wait for the phone to boot.
Installing a custom recovery on your Android smartphone lets you explore the all-new world of flashing custom ROMs,and tweak your phone's performance by installing a custom Kernel on your device .It's not limited upto this extent , as flashing a recovery let's you install various mods onto your phone like the Bravia Engine from SONY and highly famous Beats Audio for music lovers .
So,in today's tutorial I will help you install a custom recovery onto your Moto G . Rooting guide has been given in last tutorial
Recalling,Moto G is powered by a 1GB RAM,with a quad-core 1.2GHz Snapdragon 400 processor with a HD display at 329ppi and Gorilla Glass 3.It has a 5MP snapper with HD video recording.
Let's begin-
1.Download ADB and fastboot (500kb Credit-MXROOTROM) from here
2.Select and download your recovery and put in the same folder where you extracted ADB and Fastoot
CWM-Here
CWM Touch-Here
TWRP-Here
3.Open Terminal Window-Shift+Right Click
4.Type code
fastboot flash recovery recovery.img
[NOTE-I am not responsible for Bricked devices and dead SD Cards]
Source-MXROOTROM,XDA-Developers(a1Pha)


So,in today's tutorial I will help you install a custom recovery onto your Moto G . Rooting guide has been given in last tutorial
Recalling,Moto G is powered by a 1GB RAM,with a quad-core 1.2GHz Snapdragon 400 processor with a HD display at 329ppi and Gorilla Glass 3.It has a 5MP snapper with HD video recording.
Let's begin-
1.Download ADB and fastboot (500kb Credit-MXROOTROM) from here
2.Select and download your recovery and put in the same folder where you extracted ADB and Fastoot
CWM-Here
CWM Touch-Here
TWRP-Here
3.Open Terminal Window-Shift+Right Click
4.Type code
fastboot flash recovery recovery.img
[NOTE-I am not responsible for Bricked devices and dead SD Cards]
Source-MXROOTROM,XDA-Developers(a1Pha)
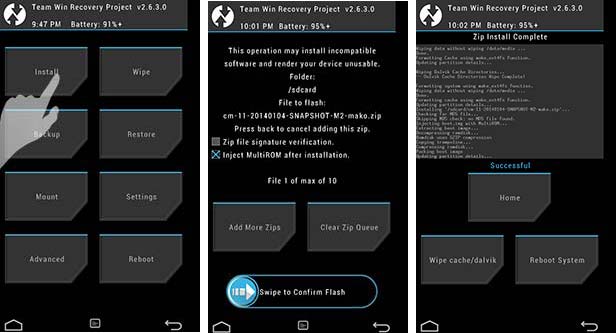
1.TWRP-Source Google Images

2.CWM-Google Images
Moto X,quite popular and bought for it's features rather than specs , primarily the always-on listening which allowed the users to control their smartphones by voice commands and the other one , active display which when the phone is listed displays the notifications on the lockscreen
The always-on listening worked out due to an additional co-processor , which also helped in saving battery by not using the main cores of the device
This feature was ported to a Nexus 5 which contains a Snapdragon 800 which contains an dedicated signal processing core that makes it to work out. Guillaume Lesniak from OmniROM was first to demo the capability in a short proof made by him in his Google+ page .In the video, he unlocked his Nexus 5 using two words that were "Hey Snapdragon" . It is currently not released due to legal restrictions on reverse engineering and releasing source code for public availability .
Nexus 5 infact Snapdragon 800 has a low-power DSP for language processing that can be used to copy the always-on listening features by a firmware upgrade and it might also be introduced by Google into it's next Android version.
Guillaume Lesniak aims to provide these features to open community as Android is an open source project after all legal settlements and when it's more stable

SOURCE-XDA Developers,AndroidPIT
The always-on listening worked out due to an additional co-processor , which also helped in saving battery by not using the main cores of the device
This feature was ported to a Nexus 5 which contains a Snapdragon 800 which contains an dedicated signal processing core that makes it to work out. Guillaume Lesniak from OmniROM was first to demo the capability in a short proof made by him in his Google+ page .In the video, he unlocked his Nexus 5 using two words that were "Hey Snapdragon" . It is currently not released due to legal restrictions on reverse engineering and releasing source code for public availability .
Nexus 5 infact Snapdragon 800 has a low-power DSP for language processing that can be used to copy the always-on listening features by a firmware upgrade and it might also be introduced by Google into it's next Android version.
Guillaume Lesniak aims to provide these features to open community as Android is an open source project after all legal settlements and when it's more stable

SOURCE-XDA Developers,AndroidPIT
Moto G recently launched it's low budget flagship Android powered smartphone in the market.Yes,It is the Moto G.
Motorola G or Moto G,is the compact version of Moto X,which boasts a 1 Gigabyte of RAM, 4 cores each clocked at 1.2 GHz and runs a Snapdragon 400 processor which is very unlike the phones that run MediaTek processors available in the market . Camera snaps at 5MP .Display includes a 4.5-inch 1280x720 HD display at 329ppi and a protection of Gorilla Glass 3;at an unbelieveable price of 12,600 INR for 8GB and 13,999 INR for 16GB storage variants.
So let's begin with today's tutorial-
1.Download the Superboot.zip (click),and extract it somewhere on Desktop or a folder.
2.Put your device in bootloader mode (Switch the phone off and press and hold Volume(-) and Power key
3.Connect phone to your PC
4.->Windows users-Run 'superuser-windows.bat' as Administrator
->MAC - Open a terminal window to the directory containing the files, and type 'chmod +x superboot-mac.sh' followed by 'sudo ./superboot-mac.sh'
->LINUX - Open a terminal window to the directory containing the files, and type 'chmod +x superboot- linux.sh' followed by 'sudo ./superboot-linux.sh

Motorola G or Moto G,is the compact version of Moto X,which boasts a 1 Gigabyte of RAM, 4 cores each clocked at 1.2 GHz and runs a Snapdragon 400 processor which is very unlike the phones that run MediaTek processors available in the market . Camera snaps at 5MP .Display includes a 4.5-inch 1280x720 HD display at 329ppi and a protection of Gorilla Glass 3;at an unbelieveable price of 12,600 INR for 8GB and 13,999 INR for 16GB storage variants.
So let's begin with today's tutorial-
1.Download the Superboot.zip (click),and extract it somewhere on Desktop or a folder.
2.Put your device in bootloader mode (Switch the phone off and press and hold Volume(-) and Power key
3.Connect phone to your PC
4.->Windows users-Run 'superuser-windows.bat' as Administrator
->MAC - Open a terminal window to the directory containing the files, and type 'chmod +x superboot-mac.sh' followed by 'sudo ./superboot-mac.sh'
->LINUX - Open a terminal window to the directory containing the files, and type 'chmod +x superboot- linux.sh' followed by 'sudo ./superboot-linux.sh

SOURCE-MoDaCo (Paul O' Brien)

Now,if you want to root your T100,follow the steps-
1.Connect your phone to Wi-Fi or 3G/2G Network.
2.Dial *7813294# and touch "Yes" and tick"I accept the terms box"
Canvas Doodle,pretty much famous amongst the youngsters because of its features in respect to its price that are listed below.
 1)5.3" inch screen
2)1.2 GHz Quad-core processor with 512mb RAM (Qualcomm MSM8225Q Snapdragon Chipset)
3)Android 4.1.2 Jellybean
4)Dual SIM
5)4GB internal memory , expandable upto 32GB
6)8MP rear-camera with 2MP front-camera
Charge your phone above 70%
Follow the instructions-
1.Download Framaroot.apk
2.Place it into your SD-Card and install it.
3.Open and select "Gandalf Exploit".
4.After the process,reboot your device.
NOTE-WE ARE NOT RESPONSIBLE FOR ANY DAMAGE CAUSED TO YOUR PHONE

2)1.2 GHz Quad-core processor with 512mb RAM (Qualcomm MSM8225Q Snapdragon Chipset)
3)Android 4.1.2 Jellybean
4)Dual SIM
5)4GB internal memory , expandable upto 32GB
6)8MP rear-camera with 2MP front-camera
Charge your phone above 70%
Follow the instructions-
1.Download Framaroot.apk
2.Place it into your SD-Card and install it.
3.Open and select "Gandalf Exploit".
4.After the process,reboot your device.
NOTE-WE ARE NOT RESPONSIBLE FOR ANY DAMAGE CAUSED TO YOUR PHONE
Requirements:
 1-Download these files:
1-CF-Autoroot Depending on your model number which could be found in Setting-> About Phone:
A) For N7100 Model go HERE.
B) For N7105 Model go HERE.
C) SHV-E250K Model go HERE.
D) SHV-E250L Model go HERE.
E) SHV-E250S Model go HERE.
F) SPH-L900 Model go HERE
G) SGH-I317 Model go HERE
H) SGH-I317M Model go HERE
I) SGH-T889 (T-Mobile version) Model go HERE
IF you didn't see your model number above don't try this method because it might brick your phone.2-Odin 3.07 From HERE.
3-Samsung USB Drivers from HERE and then install them.
4-Make sure to backup your EFS file before proceeding.
1:Extract the CF-Autoroot until you got a file with .tar.md5
2: Extract odin307.zip then run Odin3 v3.07 as administrator.
3:Shutdown your Note 2 completely. Then, hold down the volume down button+ the home button then press the power button for 5 seconds, after you will see a warning screen just press volume up.
4: Now click on “PDA” and choose the .tar.md5 file we downloaded earlier. Then connect the USB cable to your computer then to your Galaxy Note 2. Now Click on “Start”.
5: Once it successfully finishes you will see “Pass” in the above table of the “ID:COM”
NOTE-WE ARE NOT RESPONSIBLE FOR ANY DAMAGE CAUSED TO YOUR PHONE

1-CF-Autoroot Depending on your model number which could be found in Setting-> About Phone:
A) For N7100 Model go HERE.
B) For N7105 Model go HERE.
C) SHV-E250K Model go HERE.
D) SHV-E250L Model go HERE.
E) SHV-E250S Model go HERE.
F) SPH-L900 Model go HERE
G) SGH-I317 Model go HERE
H) SGH-I317M Model go HERE
I) SGH-T889 (T-Mobile version) Model go HERE
IF you didn't see your model number above don't try this method because it might brick your phone.2-Odin 3.07 From HERE.
3-Samsung USB Drivers from HERE and then install them.
4-Make sure to backup your EFS file before proceeding.
1:Extract the CF-Autoroot until you got a file with .tar.md5
2: Extract odin307.zip then run Odin3 v3.07 as administrator.
3:Shutdown your Note 2 completely. Then, hold down the volume down button+ the home button then press the power button for 5 seconds, after you will see a warning screen just press volume up.
4: Now click on “PDA” and choose the .tar.md5 file we downloaded earlier. Then connect the USB cable to your computer then to your Galaxy Note 2. Now Click on “Start”.
5: Once it successfully finishes you will see “Pass” in the above table of the “ID:COM”
NOTE-WE ARE NOT RESPONSIBLE FOR ANY DAMAGE CAUSED TO YOUR PHONE
Rooting is the first step to customize your device. Without rooting absolutely 'extraordinary' nothing is possible. Just follow the steps.
1. Charge your device more than 80%.
2. Backup your contacts, messages, apps and everything you want. For the contacts and messages you can just about use anything off the Play Store with a few stars and good reviews. But for the apps I would personally recommend the Astro/ES File Manager app.
3. Download the zip file for root and place it directly on your SD card, not in any folder. Do not extract it.
4. Switch off your phone.
5. Press the Home button, Power button and the Volume Up button and keep holding it until the Samsung logo appears. Now let go of the buttons. You will see that some writings have come in red colour. This is called the Recovery Mode. Your touch screen wont work now. So don't panic if you touch the screen and nothing happens. Only the volume buttons, home button and the power buttons work now. Volume buttons for going up and down. Home button for selecting and Power key for going back to previous screen.
6. Select 'Apply update from sd card'.
7. Choose the file that you have downloaded and select yes.
8. After that you'll be taken to another screen where there will be an option 'Reboot system now'. Select it and be patient and wait for your phone to switch on.
9. Check your apps and if you see the Superuser app, it means you are rooted.
10. Now open it and update the binaries.
 Download update.zip
1. Charge your device more than 80%.
2. Backup your contacts, messages, apps and everything you want. For the contacts and messages you can just about use anything off the Play Store with a few stars and good reviews. But for the apps I would personally recommend the Astro/ES File Manager app.
3. Download the zip file for root and place it directly on your SD card, not in any folder. Do not extract it.
4. Switch off your phone.
5. Press the Home button, Power button and the Volume Up button and keep holding it until the Samsung logo appears. Now let go of the buttons. You will see that some writings have come in red colour. This is called the Recovery Mode. Your touch screen wont work now. So don't panic if you touch the screen and nothing happens. Only the volume buttons, home button and the power buttons work now. Volume buttons for going up and down. Home button for selecting and Power key for going back to previous screen.
6. Select 'Apply update from sd card'.
7. Choose the file that you have downloaded and select yes.
8. After that you'll be taken to another screen where there will be an option 'Reboot system now'. Select it and be patient and wait for your phone to switch on.
9. Check your apps and if you see the Superuser app, it means you are rooted.
10. Now open it and update the binaries.

Hey droidsters! Today we've come with yet another guide for the famous Google Nexus 4(Developed by LG)
With this rooting toolkit you can root your Nexus 4 device.It is developed by Senior Moderator / Recognized Developer -OP of xda-developers
FUNCTIONS OF GOOGLE NEXUS 4 TOOLKIT V2.0.0 [30TH APRIL 2013]
* Install correct adb/fastboot drivers automatically on Windows xp/vista/7/8 32bit+64bit
* Backup/Restore a single package or all apps, user data and Internal Storage
* Backup your /data/media (virtual SD Card) to your PC for a Full Safe backup of data
* Unlock/Re-Lock your Bootloader
* Root Stock Jelly Bean builds (upto 4.2.2 JDQ39)
* 1-Click For All to Unlock, Root, Rename the Restore File
* Perform a FULL NANDROID Backup of your system (Boot, Cache, Data, Recovery and System) via adb and save in Custom Recovery format on your PC which can be Restored via CWM Recovery
* Pull /data and /system folders, compress to a .tar file and save to your PC
* Dump selected Phone Partitions, compress to a .zip file with md5 and save to your PC
* Install BusyBox on your phone
* Extras, Tips and Tricks section (professional only feature)
* Auto Update ToolKit to latest available version at startup (professional only feature)
* Program up to 10 Quickpic slots and run them very quickly (professional only feature)
* Mods section to automatically perform certain tasks on your phone
* Download Google Stock Image directly to correct ToolKit folder for extracting and flashing (no need to move it manually anymore)
* Check md5 of stock image to make sure downloaded file isn't corrupted before flashing
* Flash Custom Recovery or Google Stock Image to phone
* Rename the Recovery Restore File present on some Stock Roms
* Boot into CWM Touch, TWRP or Stock Recovery without Flashing it
* Boot or Flash .img Files directly from your PC
* Install a single apk or multiple apk's to your phone
* Push Files from your PC to your phone
* Pull Files from your phone to your PC
* Dump selected LogCat buffers to your PC
* Dump BugReport to your PC
* Set Files Permissions on your phone
* Open new Command Prompt for manual input
* Reboot Phone to Fastboot Mode or Android from fastboot mode
* Reboot Phone to Fastboot Mode, Recovery, Android or Download Mode from adb mode
* Display Important Information about your device
Download here


1. INSTALLING ADB/FASTBOOT DRIVERS
The first thing you need to do is to install the adb/fastboot drivers. These are needed so that you can unlock your bootloader, root your phone and perform other adb/fastboot functions.
THE DRIVERS CAN NOW BE INSTALLED DIRECTLY VIA THE TOOLKIT. OPTION 1 IN THE MAIN MENU.
IF YOU HAVE ANY TROUBLE WITH THE TOOLKIT INSTALLING THE DRIVERS PLEASE POST IN THIS THREAD WITH YOUR OPERATING SYSTEM VERSION AND ERROR MESSAGE.
a. If you dont want to use the ToolKit to install the drivers then the best best drivers to try are PdaNet for Android, download and run the 32-bit Windows 7/Vista/XP or 64-bit Windows 7/Vista and follow the instructions to install.
b. After the drivers have been installed disconnect the usb cable and shut down your phone. Keep holding the 'Volume Up' and 'Volume Down' buttons and press the 'Power' button to boot the phone into FastBoot Mode.
c. Goto your Control Panel on your PC and open the Device Manager. You want this open so you can see the FastBoot driver is installed or so you can install it manually.
d. Connect the usb cable. In the Device Manager a new item called 'Android 1.0' should pop up and then the driver should install automatically. Once it is installed you will have a new section in the Device Manager called Android Phone without an "!" meaning its installed correctly.
MAKE SURE YOU ENABLE USB DEBUGGING IN SETTINGS, DEVELOPER OPTIONS BEFORE CONNECTING THE USB CABLE IN ADB MODE SO THAT THE PC CAN DETECT THE PHONE PROPERLY.
Note 1: If the driver doesnt install automatically then double click on the Android 1.0 item, then click on the driver tab and select 'update driver'. Select 'browse my computer' and browse to the Google Nexus 4 ToolKit\driver folder. Make sure sub folders is ticked. Drivers should then be installed correctly.
--------------------------------------------------------------
2. USING MSKIPS' NEXUS 4 TOOLKIT
a. Download the Nexus 4 ToolKit package and install the ToolKit to your PC (to the default location if possible). The installation will create a Shortcut on your desktop called 'Nexus 4 ToolKit' for easy access. You have the option to include or exclude the drivers files at installation so if you already have your drivers set up and are just updating the ToolKit then you can untick the drivers if you wish.
b. Once the ToolKit is installed make sure your phone is booted and plugged in via USB cable and double click on the shortcut on your desktop to run it. If running the file directly please use the toolkit.exe file to start the Toolkit and not the tkmain.exe file or it may not work properly.
c. You will be asked if you want to check for an Update. If you type 'yes' this will download and check the latest version numbers against the versions in the ToolKit. If there is an update available then you will have the option to download and install it (professional only feature).
d. You will now be presented with a Model Selection Screen to choose the Model/Build that you are currently on. Type the number that corresponds to your desired selection. For example type '13' for GSM MODEL [MAKO] 4.2.2 [Build JDQ39]. If you cannot find the build your device is using then type 'h' to select the HELP option to get more info.
NOTE1: If you have a new build that isnt covered by the Toolkit you can also type 'a' in the Model Selection screen to see instructions on how to pull your stock image and send it to firmware.support@skipsoft.net so support can be added.
NOTE2: You can also type 00 on the Model Selection screen to go straight to the activation screen so you can type your code and upgrade to the Professional version.
e. The Toolkit will now locate and download the image pack for your chosen Model. This is a new feature so the Toolkit is not limited to how many Models can be added and it cuts down ALOT on the download size. After the zip file has finished downloading it will be extracted to the correct folders and the files checked to make sure everything is ok. If you cannot download the pack via the Toolkit then you can download it manually from http://goo.im/devs/mskip/toolkit/goo...files/MAKO.zip and extract the 2 folders to your installation folder.
f. When you enter the Main Menu you will see 'Adb Mode' and 'Fastboot Mode' at the top. If you have installed your drivers correctly then you will see your devices serial number under the text with 'device' next to it for the mode you are in. If you see this then your device is connected and you can carry on.
NOTE: If you haven't installed the drivers and don't see a serial number at the top then this is the FIRST thing you want to do so the Toolkit can operate properly. You may need to do this in adb and fastboot mode.
g. Each option in the ToolKit has full information on what it is and how to use it.
--------------------------------------------------------------
USEFUL INFORMATION
How to get into your FastBoot Mode
1. Turn your phone off
2. Unplug your usb cable if you have one plugged in
3. Keep holding the 'Volume Up' and 'Volume Down' buttons and press the 'Power' button to boot the phone into FastBoot Mode
How to get into ClockworkMod Recovery
1. First boot into FastBoot Mode as described above
2. Scroll down with the 'Volume Down' button until it says 'Recovery mode' at the top and press the 'Power' button to enter Recovery
Show the Menu in the Stock Recovery Screen
1. Hold the Power button and keep holding as you press the Volume Up button. The blue recovery menu screen should pop up.
--------------------------------------------------------------
With this rooting toolkit you can root your Nexus 4 device.It is developed by Senior Moderator / Recognized Developer -OP of xda-developers
FUNCTIONS OF GOOGLE NEXUS 4 TOOLKIT V2.0.0 [30TH APRIL 2013]
* Install correct adb/fastboot drivers automatically on Windows xp/vista/7/8 32bit+64bit
* Backup/Restore a single package or all apps, user data and Internal Storage
* Backup your /data/media (virtual SD Card) to your PC for a Full Safe backup of data
* Unlock/Re-Lock your Bootloader
* Root Stock Jelly Bean builds (upto 4.2.2 JDQ39)
* 1-Click For All to Unlock, Root, Rename the Restore File
* Perform a FULL NANDROID Backup of your system (Boot, Cache, Data, Recovery and System) via adb and save in Custom Recovery format on your PC which can be Restored via CWM Recovery
* Pull /data and /system folders, compress to a .tar file and save to your PC
* Dump selected Phone Partitions, compress to a .zip file with md5 and save to your PC
* Install BusyBox on your phone
* Extras, Tips and Tricks section (professional only feature)
* Auto Update ToolKit to latest available version at startup (professional only feature)
* Program up to 10 Quickpic slots and run them very quickly (professional only feature)
* Mods section to automatically perform certain tasks on your phone
* Download Google Stock Image directly to correct ToolKit folder for extracting and flashing (no need to move it manually anymore)
* Check md5 of stock image to make sure downloaded file isn't corrupted before flashing
* Flash Custom Recovery or Google Stock Image to phone
* Rename the Recovery Restore File present on some Stock Roms
* Boot into CWM Touch, TWRP or Stock Recovery without Flashing it
* Boot or Flash .img Files directly from your PC
* Install a single apk or multiple apk's to your phone
* Push Files from your PC to your phone
* Pull Files from your phone to your PC
* Dump selected LogCat buffers to your PC
* Dump BugReport to your PC
* Set Files Permissions on your phone
* Open new Command Prompt for manual input
* Reboot Phone to Fastboot Mode or Android from fastboot mode
* Reboot Phone to Fastboot Mode, Recovery, Android or Download Mode from adb mode
* Display Important Information about your device
Download here


--------------------------------------------------------------
1. INSTALLING ADB/FASTBOOT DRIVERS
The first thing you need to do is to install the adb/fastboot drivers. These are needed so that you can unlock your bootloader, root your phone and perform other adb/fastboot functions.
THE DRIVERS CAN NOW BE INSTALLED DIRECTLY VIA THE TOOLKIT. OPTION 1 IN THE MAIN MENU.
IF YOU HAVE ANY TROUBLE WITH THE TOOLKIT INSTALLING THE DRIVERS PLEASE POST IN THIS THREAD WITH YOUR OPERATING SYSTEM VERSION AND ERROR MESSAGE.
a. If you dont want to use the ToolKit to install the drivers then the best best drivers to try are PdaNet for Android, download and run the 32-bit Windows 7/Vista/XP or 64-bit Windows 7/Vista and follow the instructions to install.
b. After the drivers have been installed disconnect the usb cable and shut down your phone. Keep holding the 'Volume Up' and 'Volume Down' buttons and press the 'Power' button to boot the phone into FastBoot Mode.
c. Goto your Control Panel on your PC and open the Device Manager. You want this open so you can see the FastBoot driver is installed or so you can install it manually.
d. Connect the usb cable. In the Device Manager a new item called 'Android 1.0' should pop up and then the driver should install automatically. Once it is installed you will have a new section in the Device Manager called Android Phone without an "!" meaning its installed correctly.
MAKE SURE YOU ENABLE USB DEBUGGING IN SETTINGS, DEVELOPER OPTIONS BEFORE CONNECTING THE USB CABLE IN ADB MODE SO THAT THE PC CAN DETECT THE PHONE PROPERLY.
Note 1: If the driver doesnt install automatically then double click on the Android 1.0 item, then click on the driver tab and select 'update driver'. Select 'browse my computer' and browse to the Google Nexus 4 ToolKit\driver folder. Make sure sub folders is ticked. Drivers should then be installed correctly.
--------------------------------------------------------------
2. USING MSKIPS' NEXUS 4 TOOLKIT
a. Download the Nexus 4 ToolKit package and install the ToolKit to your PC (to the default location if possible). The installation will create a Shortcut on your desktop called 'Nexus 4 ToolKit' for easy access. You have the option to include or exclude the drivers files at installation so if you already have your drivers set up and are just updating the ToolKit then you can untick the drivers if you wish.
b. Once the ToolKit is installed make sure your phone is booted and plugged in via USB cable and double click on the shortcut on your desktop to run it. If running the file directly please use the toolkit.exe file to start the Toolkit and not the tkmain.exe file or it may not work properly.
c. You will be asked if you want to check for an Update. If you type 'yes' this will download and check the latest version numbers against the versions in the ToolKit. If there is an update available then you will have the option to download and install it (professional only feature).
d. You will now be presented with a Model Selection Screen to choose the Model/Build that you are currently on. Type the number that corresponds to your desired selection. For example type '13' for GSM MODEL [MAKO] 4.2.2 [Build JDQ39]. If you cannot find the build your device is using then type 'h' to select the HELP option to get more info.
NOTE1: If you have a new build that isnt covered by the Toolkit you can also type 'a' in the Model Selection screen to see instructions on how to pull your stock image and send it to firmware.support@skipsoft.net so support can be added.
NOTE2: You can also type 00 on the Model Selection screen to go straight to the activation screen so you can type your code and upgrade to the Professional version.
e. The Toolkit will now locate and download the image pack for your chosen Model. This is a new feature so the Toolkit is not limited to how many Models can be added and it cuts down ALOT on the download size. After the zip file has finished downloading it will be extracted to the correct folders and the files checked to make sure everything is ok. If you cannot download the pack via the Toolkit then you can download it manually from http://goo.im/devs/mskip/toolkit/goo...files/MAKO.zip and extract the 2 folders to your installation folder.
f. When you enter the Main Menu you will see 'Adb Mode' and 'Fastboot Mode' at the top. If you have installed your drivers correctly then you will see your devices serial number under the text with 'device' next to it for the mode you are in. If you see this then your device is connected and you can carry on.
NOTE: If you haven't installed the drivers and don't see a serial number at the top then this is the FIRST thing you want to do so the Toolkit can operate properly. You may need to do this in adb and fastboot mode.
g. Each option in the ToolKit has full information on what it is and how to use it.
--------------------------------------------------------------
USEFUL INFORMATION
How to get into your FastBoot Mode
1. Turn your phone off
2. Unplug your usb cable if you have one plugged in
3. Keep holding the 'Volume Up' and 'Volume Down' buttons and press the 'Power' button to boot the phone into FastBoot Mode
How to get into ClockworkMod Recovery
1. First boot into FastBoot Mode as described above
2. Scroll down with the 'Volume Down' button until it says 'Recovery mode' at the top and press the 'Power' button to enter Recovery
Show the Menu in the Stock Recovery Screen
1. Hold the Power button and keep holding as you press the Volume Up button. The blue recovery menu screen should pop up.
--------------------------------------------------------------
Source-XDA-Developers
NOTE-WE'RE NOT RESPONSIBLE FOR ANY DAMAGE CAUSED TO YOUR PHONE
Make sure the following things-
1. Make sure your mobile should has 70% to 80% battery
2. Enable USB debugging mode Settings > Manage Applications > Development > USB Debugging – check box)
3. Backup your important data
4. Install Samsung Galaxy S Duos S7562 drivers or Samsung KIES (drivers are already included )
Follow these steps-
1.Download and extract Samsung Galaxy S duos rooting kit on your computer.
2.Switch Off your phone, take out the battery and insert it back. Now turn on your phone into Download Mode by pressing and holding the Volume Down + Home button together, and then press the Power button till you see the Android logo. Once again press Power button to confirm.
3. Open “Odin.exe” (from extracted folder) and connect your phone via USB cable with your computer in download mode. If your phone is connected successfully the one of the ID:COM boxes will turn yellow.
4.Click on “PDA” button and select file “recovery.tar” (from extracted folder).
5.Please make sure that only F. Reset Time and Auto Reboot options are checked on Odin.

6.Now, click on the Start button on Odin to start the installation process. Installation will take a few minutes to complete so please wait for the complete process.
7.Finally, when the installation process is completed successfully you will see the “PASS” message on Odin and then your device will reboot automatically. When the phone boots up (vibrates) then immediately remove the battery and after 1-2 minutes start your phone. (MAIN STEP)
Your Samsung Galaxy S duos S7562 now has been rooted and you can check the Super app installed on your device. In case, if you want to verify then download Root Checker and verify it by yourself only.
Flashing Clockworkmod-
8.Now, placed the “CWM Recovery file” in the SD card.
9.Switch off your phone to boot into recover mode by press and holding Volume Up + Home button together, and then press the Power button.
10.From the recovery menu, select “Install zip from sdcard” and go to path where you have 11.When the installation process is completed select “++++Go Back++++” and then choose “reboot system” to reboot your phone.
NOTE-WE ARE NOT RESPONSIBLE FOR DAMAGE CAUSED TO YOUR PHONE.
Source-iDroidSpace
If you updated your phone ,ZTE Blade using the update.zip given by ZTE and you want to root your phone now and can't find any solution ....you've came to the right place!
I also had the same problem last few weeks but i figured it out.....tried on my ZTE Blade and it's rooted now :D.It was posted by us on modaco.com.
FOLLOW THESE STEPS-
1.Download this file CLICK HERE
2.Rename it to 'update.zip' [without the inverted commas]
3.Move it to the SD Card
3.Turn off your phone
4.Press and hold Volume UP Button+Home Button+Power Up Button
5.A menu will appear
6.Scroll down to 'Apply update.zip from SD Card'
7.Press Back button
8.Wait for the process and now Reboot the phone
9.Download Root Checker Basic and Superuser from Play Store
10.Open the Root Checker Basic and Tap Once at "Verify Root access"
11.A popup window will appear,touch on "Allow"
12.Congratulations!your device is rooted now!!

I also had the same problem last few weeks but i figured it out.....tried on my ZTE Blade and it's rooted now :D.It was posted by us on modaco.com.
FOLLOW THESE STEPS-
1.Download this file CLICK HERE
2.Rename it to 'update.zip' [without the inverted commas]
3.Move it to the SD Card
3.Turn off your phone
4.Press and hold Volume UP Button+Home Button+Power Up Button
5.A menu will appear
6.Scroll down to 'Apply update.zip from SD Card'
7.Press Back button
8.Wait for the process and now Reboot the phone
9.Download Root Checker Basic and Superuser from Play Store
10.Open the Root Checker Basic and Tap Once at "Verify Root access"
11.A popup window will appear,touch on "Allow"
12.Congratulations!your device is rooted now!!

NOTE-WE ARE NOT RESPONSIBLE FOR ANY DAMAGE CAUSED TO YOUR PHONE.
As with any process which involves tampering with your phone's firmware, rooting your device can have negative as well as positive consequences. Although it's unlikely, you could end up with a bricked and unresponsive handset -- so consider yourself warned. You'll also void your warranty.
Another thing to note is that this guide relates to the GT-i9505 with the Snapdragon 600 chipset, and not the octo-core variant. This process will also not work with S4 handsets which have the a software baseband ending in MDM. You can find out your baseband reference by going to Settings > More > About Phone. And finally, this guide assumes you're using Windows 7 on your PC.
FOLLOW THESE STEPS-
1.Backup your phone
2.Download Motochopper
3.Extract the files somewhere

4.Switch on USB Debugging by going into Settings>More>About Phone,Scroll Down to build number and tap it continuously ,this will enable Developer Menu which you will find in More of the Settings Menu. Go there and enable USB Debugging
5.Connect your phone using a USB Cable
6.Go to the folder where you have extracted the Motochopper and double click the 'Run' exe file
7.You will see a windows like this

8.Press Enter and follow the instructions carefully and your phone will be rooted :)
Anyone who wants a detailed video guide can See Here(Click) <---Not my work :I,I don't own a Galaxy S4 :(
Anyone who wants a detailed video guide can See Here(Click) <---Not my work :I,I don't own a Galaxy S4 :(
NOTE-WE ARE NOT RESPONSIBLE FOR ANY DAMAGE CAUSED TO YOUR PHONE.
Popular Posts
-
The update is now available for the LTE version of the Xperia Z (C6603) in Spain and Ukraine. Carriers in Austria, Czech Republic and the ...
-
 As with any process which involves tampering with your phone's firmware, rooting your device can have negative as well as positive con...
 -
 If you updated your phone ,ZTE Blade using the update.zip given by ZTE and you want to root your phone now and can't find any solution ...
 -
Xperia Z2 has impressive numbers in contrast to hardware specifications and a good update to the Xperia Z1,the predecessor,mainly the displ...
-
Rooting is the first step to customize your device. Without rooting absolutely 'extraordinary' nothing is possible. Just follow th...
